Overclock Your Game Boy Advance SP

Game Boy

Here’s part 2 in our Game Boy Advance overclocking series. Do you want overclocked gaming action, but the screen on the original GBA is too dark because you never got your Afterburner kit? Why not overclock a GBA-SP?


Read More »

4 Comments »

Overclock Your Game Boy Advance

Game Boy

Overclocking your GBA (and underclocking it) will allow you to skip boring parts of games, make them more challenging, slow down parts that are too difficult, or squeeze out some extra clock cycles for your homebrew apps. You also get to show off your modded GBA in front of your “L33T” friends. It’s not as hard as you might think, and you can switch between speeds on the fly.


Read More »

9 Comments »

Fixing a NES

NES

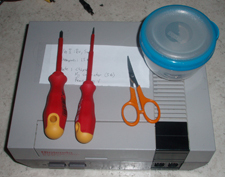
Emulators are great, but sometimes you want to go totally old-school and play 8-bit games on original hardware. This article describes a few problems commonly experienced by the NES and how to fix them.

Fixing a NES

2 Comments »

Build A USB Car Charger

Phones

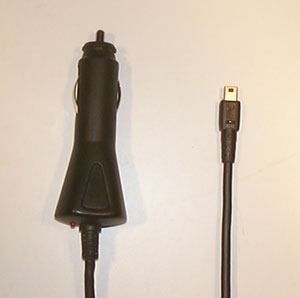
More and more portable devices connect to their chargers via mini-USB 2.0 connectors.  In this article I’ll show you how to build a car charger for your Blackberry, Pocket PC, phone, PSP, bluetooth headset, etc. out of junk you probably already have lying around your house.

USB Car Charger

Read More »

14 Comments »

MoMoLight

Shiny

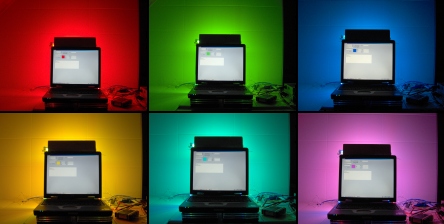
The author built his own Movie Mood Light that mimics the Philips Ambilight system. It detects the average color of the top, left and right edges of a video image and uses PWM to match the colors with a set of cold cathodes (or LEDs if you prefer). This tutorial walks you through the hardware construction and provides the direct show filter and the hex code for the PIC.

MoMoLight Color Test

No Comments »

The ElectriClerk

Case Mods

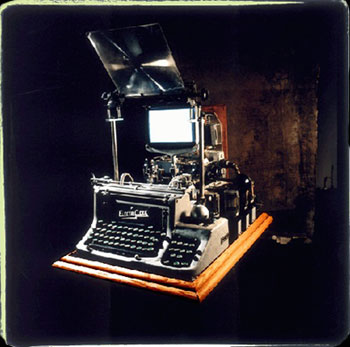
Inspired by the retro-futuristic machines in the movie Brazil, Andrew Leman created this fully functional 1988 Mac with a 1923 Underwood typewriter.

The ElectriClerk

No Comments »

Build a Low-Cost, Extended Range RFID Skimmer

RFID

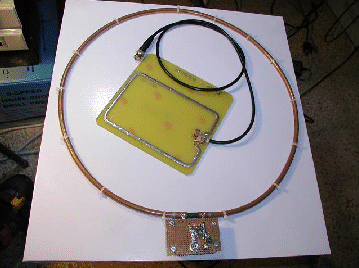
This article shows how to build a portable, extended-range RFID skimmer using readily available tools and parts. The skimmer is able to read ISO-14443 tags from a distance of approximately 25cm. It uses a lightweight 40cm-diameter copper-tube antenna, is powered by a 12V battery, and can be built on a budget of about $100.

RFID Skimmer

1 Comment »

Numbers Stations

Puzzles

Numbers Station

Numbers stations are shortwave radio stations that are heard from time to time transmitting strings of numbers.  The broadcasts typically start out with music or a series of tones to identify the station, then a string of spoken numbers that make up a coded message.  The intended recipient is usually unknown, but it is assumed that most of them are meant for spies.  Most of these messages go undeciphered.

Read More »

No Comments »

Game Boy Advance Development in Linux

Game Boy

Avelino Herrera Morales has a site containing several hardware and software projects for the GBA. He has provided source code for a variety of utilities, games and even a GBA-MIDI interface! If you are looking to get into Game Boy Advance development you should definitely check this site out. It is also available in Spanish if that’s your language of choice.

No Comments »

Change Your XBox LEDs

XBox


Eject Button Blue

Are you tired of the puke-green and red LEDs that came with your XBox? Now you can change them in the comfort of your own home.  This article walks you through the process step-by-step.

The box uses 2x 3mm bi-color LEDs (one for each side of the ring around the eject button), which turned out to be really hard to find in anything besides red, yellow and icky-green.  You can, however, find several good color combinations here.  Wherever you get them from, make sure they are common cathode and not common anode.  This means that the center pin is negative (-) and the two outside pins for the colors are positive (+).

Here’s what you’ll need for this project:

  • T10 Torx screwdriver or bit
  • T20 Torx screwdriver or bit
  • Flat screwdriver (for prying)
  • Low-wattage soldering iron (if you like your XBox DO NOT use one of those giant soldering guns)
  • Rosin-core solder
  • Solder-sucker or solder-wick
  • Mad soldering skillz (okay, so this mod isn’t really too tough. Basic skillz should do fine.)
  • Wire cutters
  • 2x 3mm common cathode bi-color LEDs
  • XBox (duh!)

The first thing to do is take apart the XBox. Turn it upside-down and remove the 6 screws with the T20 driver. Four of them are under the rubber feet which you’ll have to peel off, and the remaining two are under the stickers.
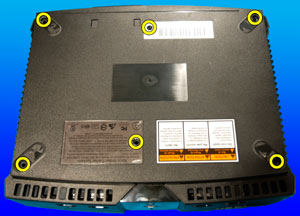
XBox Srew Locations

Once you have removed the screws, turn the XBox right-side-up, grab the sides and lift the top of the case straight up and off. Next, unplug the power and IDE cables from the hard drive and DVD-Rom drive. Remove the 3 screws that hold the caddies for both drives in place with the T10 driver. Lift both caddies out (HD first) and set them aside.
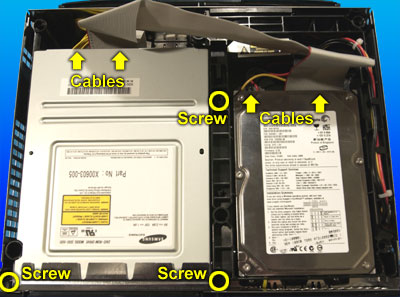
XBox Drive Screws

Unplug the front panel connector from the main board.
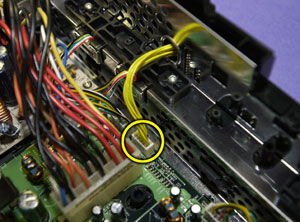
XBox Front Panel Connector

Now it’s time to separate the entire faceplate from the rest of the case. There are 3 tabs and two edges that will all need to be pried free.
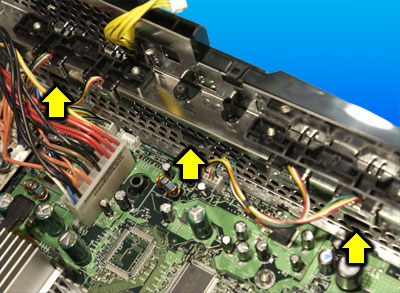
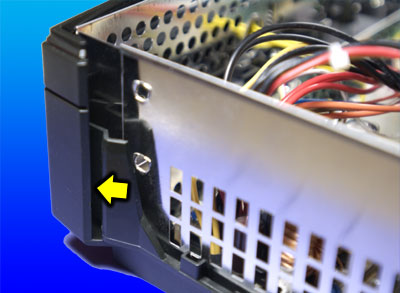
XBox Faceplate Tabs

XBox Faceplate Edge

Once you have removed the faceplate, you will be able to see the circuit board that has the LEDs and buttons mounted to it. Separate it from the faceplate by bending the two tabs and lifting the board free.
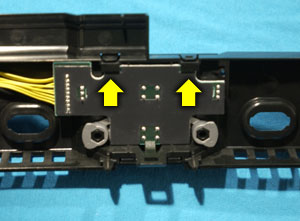
XBox Front PCB Tabs

Now that you finally have the board free you can see the LEDs that you are going to replace.
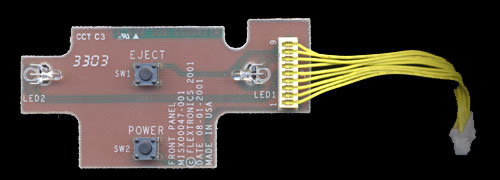
XBox Front PCB LED Side

Using your iron and solder sucker or wick, remove the solder from the 6 LED leads that protrude from the back of the board. You should be able to remove the LEDs now. If they are still stuck, apply some heat to the sticking leads.
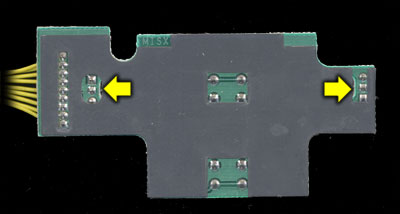
XBox LED Leads

Now you need to figure out which direction to install your new LEDs. First decide which color you want to light during normal operation (was green), and which you want during an error (was red). Use the information that you got from the LED manufacturer to determine which lead corresponds to which color (if you got your LEDs from Division 6 that information can be found here). Look at the diagram below and bend the leads on your LED so that when they are installed the correct color lead is aligned with the correct hole.
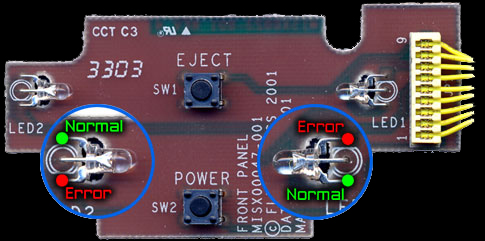
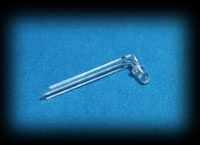
XBox LED DiagramXBox LED Bent Leads


Once you have inserted the leads from your new LEDs through the correct holes and lined them up correctly, solder them into place. Once soldering is complete, trim the excess length off of the leads. The mod is now complete.
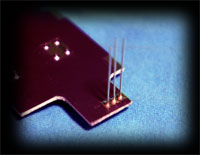
XBox LED Soldered

Reassemble your XBox in reverse order of how you took it apart. Plug it in, turn it on, and if everything was done correctly you should have shiny new colors around your eject button!

8 Comments »