Rooftop Flying Crank Ghost – Part 2
Haunting November 13th, 2007This is part 2 of the Rooftop Flying Crank Ghost article. In this half you’ll see how to make the ghost itself, connect it to the motor and install it on your roof for all your neighbors to see.
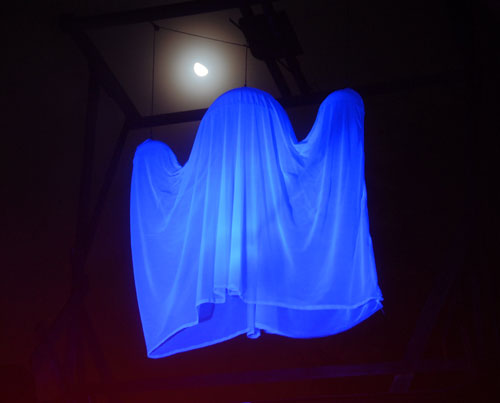
Ghost Construction
Go get the 3 transparent ball halves / domes you found. If you didn’t order the ones from Display and Costume Supply, just grab some clear plastic bowls of approximately the right size from the kitchen. Deli-platter lids would probably work too. Transparent, plastic and dome-shaped are the only requirements here.
Drill a 1/4″ hole in the center of each dome. Install an eye bolt and a couple of fender washers in each one so that the eye is just sticking out the top.
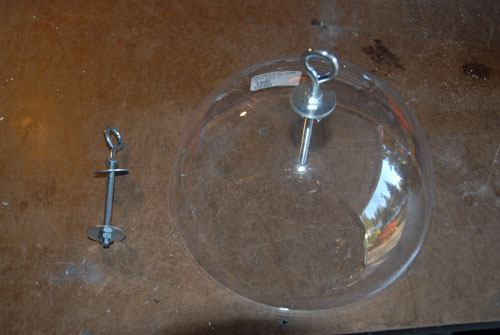
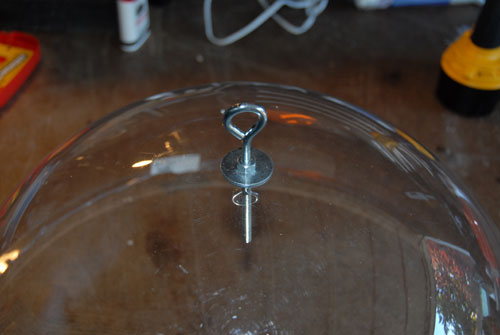
Now you can use clothesline to attach the 3 domes to the rotating arm. Start with the center one. Rotate the arm (by powering up the motor or very carefully moving it manually) until the end with the washer is as far away from the center pulley as possible. Feed one end of the clothesline through the center pulley and tie it off to the center ring on the washer.
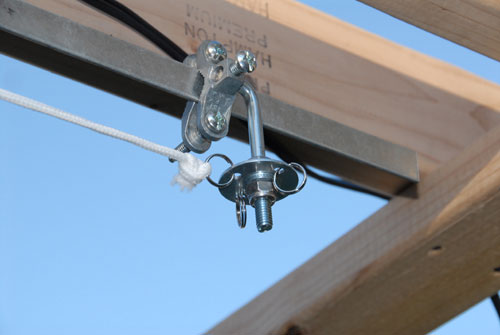
Cut the clothesline about a foot below the pulley so you have some line to work with. Tie the large dome onto the line about 2 or 3 inches below the pulley.
Note: the point of rotating the arm before attaching the dome is to ensure that it is at the very top of its travel and that it won’t get pulled up into the pulley and break when you turn the motor on.
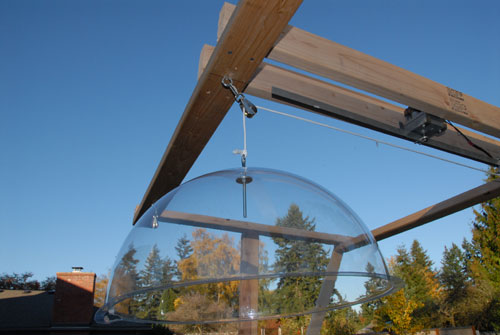
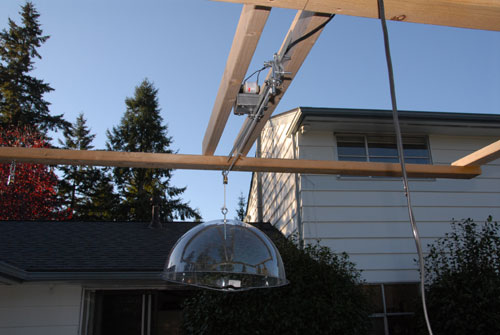
Rotate the arm so that the washer end is opposite of one of the end pulleys. Run the line through the pulley and attach it to one of the side rings. Cut the line and tie one of the smaller domes on about 6 inches below the pulley.
Rotate the arm so that it is opposite the remaining pulley and attach the last dome as above.
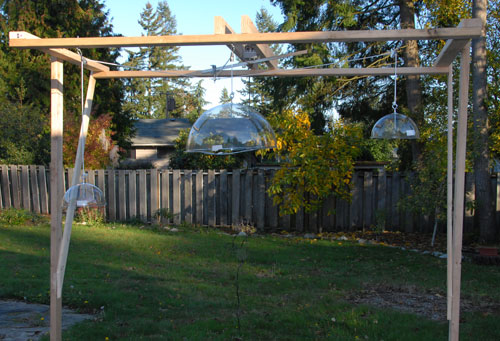
It’s time to see your ghost move for the very first time! Plug it in. Watch the 3 domes move up and down in a spooky fashion. Okay, it’s not very spooky yet, but with your powerful imagination you see the potential. Check to make sure that everything is running smoothly and nothing is binding or catching.
Once you are satisfied that all is good mechanically it’s time to paint the whole thing (except the domes) stealth black. You know the color- it costs 98 cents at the hardware store, probably isn’t so great for the environment, has a flat black lid and you’ve been using it on your Halloween stuff for years. Stay away from that expensive stuff because it doesn’t cover nearly as well.
Paint the wood, clothesline, metal hardware, motor at least good enough that it won’t show up when you are looking at it in the dark from your front yard. Be careful when painting the motor that you don’t hit moving parts and gum up the works.
While the paint is drying you can start working on the fabric ghost cover. I used Chiffon I got from Display and Costume Supply. It was fairly cheap and was already UV reactive. If you want you can just go down to whatever fabric store your mom dragged you to when you were a kid and pick out some nice ghostly fabric from the bargain bin. Make sure it is at least 54″ wide, and get 15 feet (that’s 5 yards in fabric store speak).
Take your fabric and a blacklight and go into a dark room. Fire up the blacklight and make sure that the fabric glows a nice ghostly purple. If it does then you are ready to start sewing.
If your fabric does not glow then you need to wash it with some Tide or fabric bluing. These products make your clothes “whiter than white” by making them UV reactive; just what you need to make your ghost glow.
The ghost cover is fairly easy to make. Fold your piece of fabric in half lengthwise. Sew the top and the side opposite the fold. Leave it open at the bottom. I didn’t have a sewing machine but my very nice friend took care of it for me in exchange for coffee.
Along the top seam of the cover cut 3 1″ holes, one in the middle and two at the corners. These will be for the dome eye bolts to poke through.
Mark the 3 pieces of clothesline with a Sharpie right above where you tied on the 3 domes. Untie the domes.
Starting with the large center dome, poke the eye bolt for each dome through its respective fabric hole and re-tie it to the clothesline.
You should now have a ghost hanging from a frame. Plug the motor back in and make sure everything is still moving okay. This would be the time to make any necessary adjustments to anything. If the fabric doesn’t hang right change it or adjust the spacing of the pulleys (you’ll need to drill new holes if you do this). Slide the ground clamp along the steel bar to adjust the motion of the ghost (closer to the motor = less movement). Let things run for a while so hopefully if anything is going to fail it will do it before you haul it up onto the roof. After it gets dark shine the blacklight on the ghost and make any last adjustments that may be needed to attain maximum spooktitude.
When you’re done adjusting, trim the excess clothesline from the eye bolt knots.
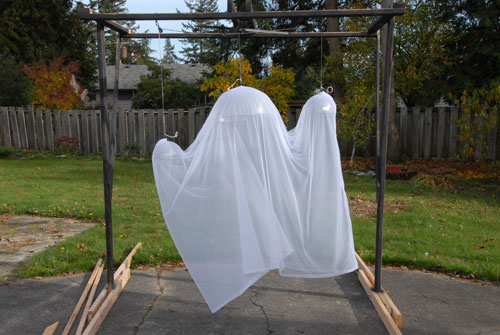
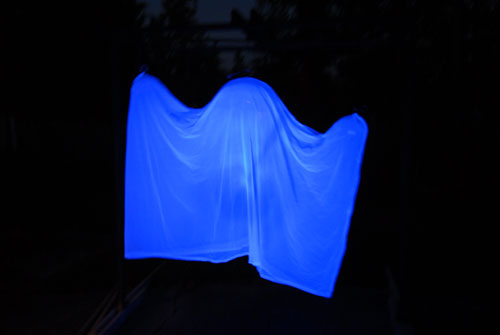
Install On Your Roof
I won’t lie to you; this part is a pain in the @$%. The cool points you get when people ask you “how did you get that thing up there” are well worth it though. Unfortunately I don’t have any pictures of the next few steps since I needed both my hands for not dying. Hopefully I’ll describe it sufficiently. Your roof will probably be totally different than mine anyway. The following instructions assume you are setting up your ghost on the point of a sloped roof.
The whole assembly is pretty heavy and cumbersome, so I found it was much easier to break it back down into several sections and re-assemble it once it was on the roof. Remove the domes and fabric. Remove the feet. Remove the legs.
Find a couple buff friends who aren’t afraid of heights.
Go on the roof with one of your friends and have someone stay on the ground to hand stuff up to you. Start by bringing up the top frame. Keep it upside-down so you don’t bend the steel bar and washer assembly by dragging it around on the roof. Re-attach the legs. Tip the assembly on its side. Re-attach the feet. Position the inside feet so that they are pointing downhill and the outside feet so that they are pointing uphill.
Get some 1″ x 4″ boards, some screws, the bolts for the feet, 2 crescent wrenches and a screw gun with a freshly charged battery ready.
Have two people tip the whole assembly upright while dragging the bottom of the legs to the point of the roof. While they hold it in place and straight go around to each foot, rotate it so that it is resting on the slope of the roof, and screw a 1″ x 4″ board between the top end of the foot and the leg. Once all four feet have been locked in place the ghost frame should stand up all by itself.
My frame wasn’t very stable from side to side by the time I got everything put back together, so I added a few extra supports.
Paint any boards that haven’t been stealthified. Don’t get any on your roof.
Plug the motor into a long extension cord and run it down to the nearest outlet.
Here is what things looked like by the time I got done:
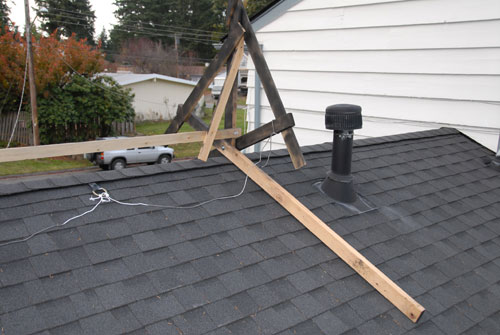
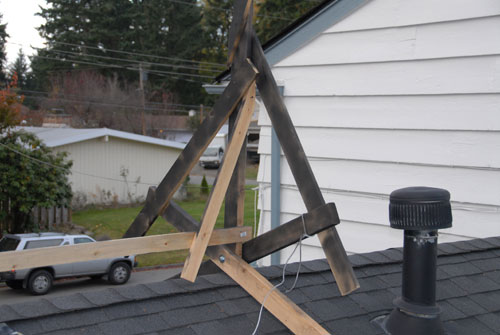
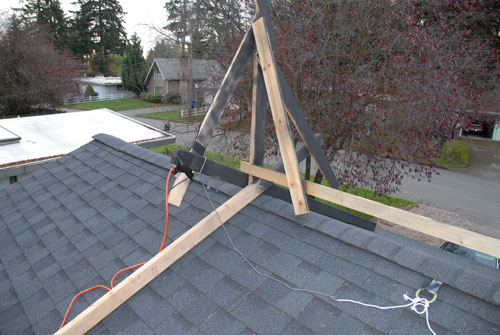
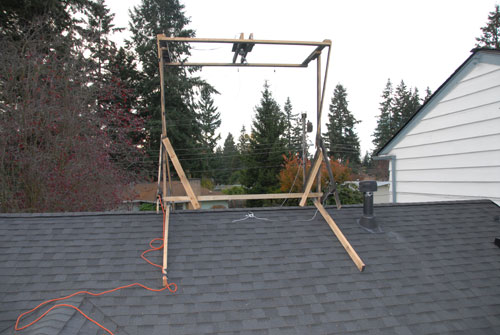
You may be noticing that I didn’t bother painting anything that couldn’t be seen from the front of my house. Hey, I probably saved myself 12 cents!
Reattach the ghost’s domes and fabric.
Climb down off of the roof. Climb back up because you left your screw gun up there.
Plug in the motor and watch your ghost float around.
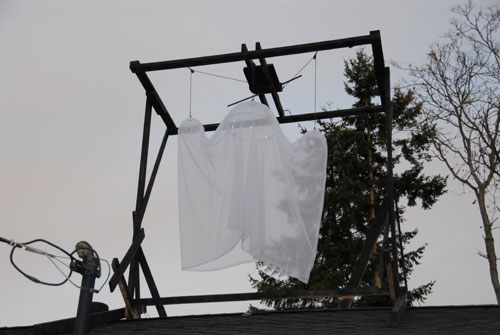
Set up a blacklight on the edge of your roof pointing up at the ghost. Run an extension cord to it.
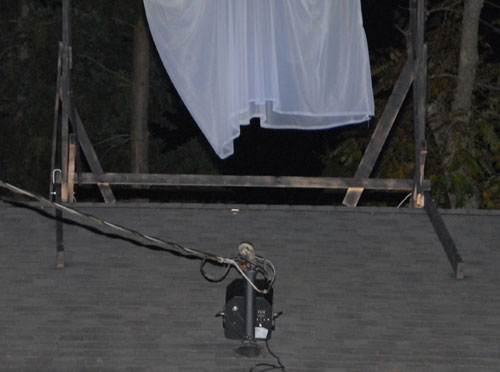
If you think there’s any chance that it is going to rain you’ll probably want to build some kind of box or cover for your blacklight.
Once it gets dark plug everything in. Adjust the blacklight so that it is hitting the ghost if needed.
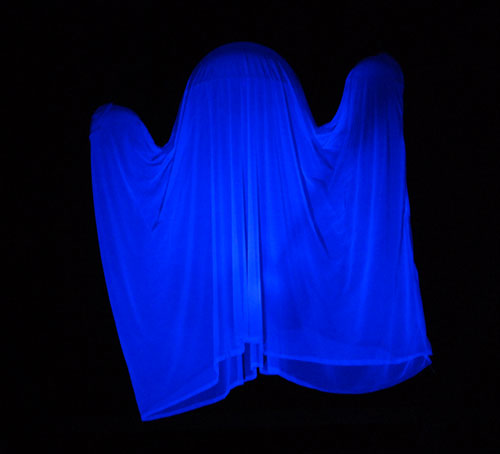
That’s it! You’re done. This is the part where you get to sit in your front yard and stare at your ghost for 3 hours.
One final note: buy lots of candy for Halloween. We got way more trick-or-treaters than any of the other houses in our neighborhood. One guy that lives 5 houses down from us who only got 1 TOT said he was going to put a ghost on his roof next year.


December 23rd, 2019 at 12:54 PM
I’m impressed, I must say. Rarely do I come across a blog that’s
both educative and entertaining, and let me tell you, you’ve hit the
nail on the head. The problem is something not enough folks
are speaking intelligently about. I am very happy that I came across this during
my hunt for something concerning this.
July 24th, 2022 at 9:50 PM
One thing I would include regarding two out of the three final pictures was to STAY FAR AWAY from the wire coming from that pole, down to the house… A simple slip could end one’s life very quickly…