Build a Pneumatic Confetti Cannon
Theatre February 4th, 2008I’ll show you how to build a pneumatic confetti cannon that sprays bits of paper all over the place at the push of a button. It is safe to use and easy to build, and the confetti shower effect it produces is excellent for stage shows, dances, parties, and those times when you need to make the biggest mess possible in just under one second.
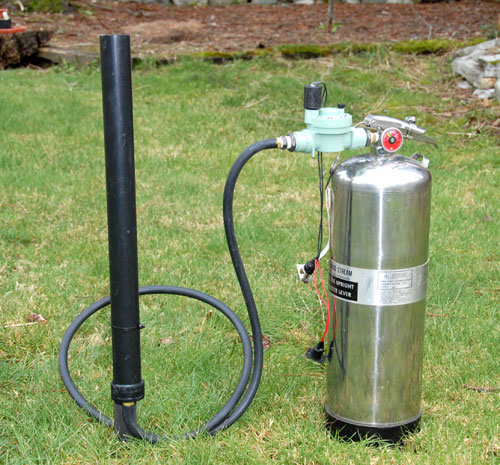
What you need
- Refillable Fire Extinguisher
- 1x 1.5″ x 2′ ABS Pipe
- 1x 1.5″ ABS End Cap
- 2x 3/8″ ID Barb to 3/8″ MIP Brass Fittings (Watts Item# A294)
- 1x 3/4″ In-Line Sprinkler Solenoid Valve (RJ 54048 or equiv.)
- 1x 3/8″ Flare to 1/2″ MIP Brass Fitting (Watts Item# A184)
- 2x 3/4″ to 1/2″ Reducers (Black Pipe)
- 1x 1/2″ to 3/8″ Reducer (Black Pipe)
- 3/8″ ID Rubber Air Hose
- Air compressor with tire inflation attachment
- 2x Adjustable Wrenches (one fairly big)
- Nylon Thread Tape
- Hose Clamps
- 1x 24VAC power supply
- Wire
- 1x Button
- Pipe Cement / Glue
- Drill
- Drill Bits
The air supply for the cannon is a refillable water fire extinguisher. It should have a valve stem sticking out the neck (like you’d find on a tire) so it can be pressurized with air. I see them all the time at garage sales and pick them up for “science”, but if you don’t have one you should be able to get one from a store that sells fire safety equipment (I’m not going to suggest that you “borrow” one from work).
If you can’t find the right fire extinguisher, any portable air tank or even your compressor itself will work; you will just need to use the proper fittings between the tank and the solenoid valve.
Make sure the air hose you get is rubber; the PVC hoses have a hard plastic tube inside the outer colored casing that doesn’t stretch enough to get over a hose barb.
The power supply used to fire the cannon would ideally be 24VAC. I used a Variac I had lying around and dialed it down to 24v, but a sprinkler system transformer or even a doorbell transformer would probably work. Feel free to experiment; it won’t hurt anything to underpower the solenoid valve and will work as long as it’s enough to make the valve open.
Prep the Fire Extinguisher
This part is fun if the extinguisher is full; pull the pin, squeeze the handle and empty it! Apologize to your friend, telling him that you thought he was on fire. Make sure all the pressure has been released.
Unscrew the hose from the extinguisher. Save this somewhere because you’ll need to put it back on if you ever want to put out fires again.
Use a large wrench to unscrew the top of the extinguisher from the tank. Set the top assembly aside. Pull the other tube out of the tank if there is one.
Dump out whatever water is still in the tank.
Reassemble the extinguisher.
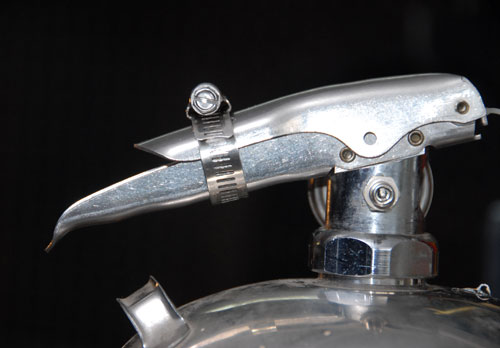
Use a hose clamp to squeeze the two halves of the handle together so the onboard valve is essentially bypassed.
Build Tank / Valve Assembly
Here are the parts of the valve assembly all laid out in the proper order:
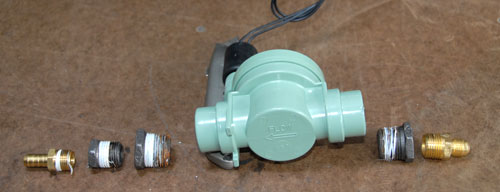
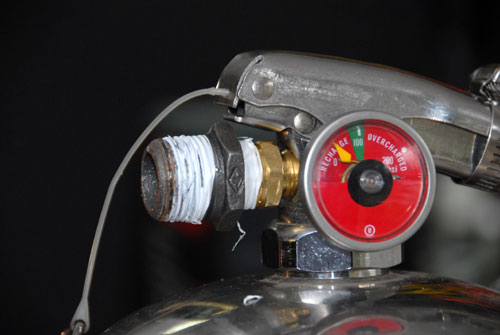
Start by wrapping some thread tape around the 3/8″ flare fitting and screw it into the output hole of the fire extinguisher. Tighten it down enough so that it shouldn’t leak but don’t go nuts and strip the threads.
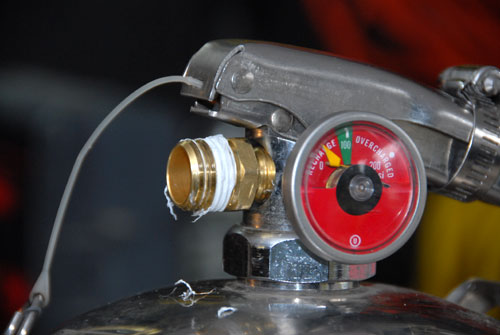
Screw one of the 3/4″ to 1/2″ reducers onto the other end of the flare fitting and tighten it down. Don’t forget the thread tape on any of these fittings or I promise you will get leaks.
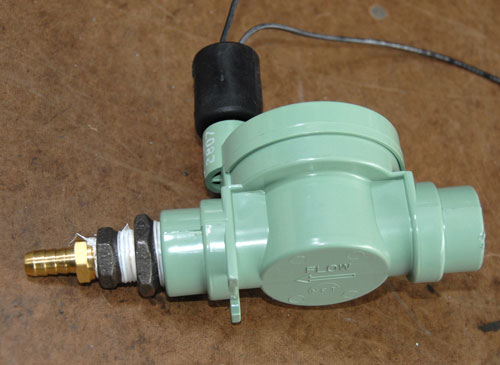
Put the extinguisher aside for a moment and assemble a hose barb and the remaining two reducers. Screw the 3/4″ end into the solenoid valve. Make sure to pay attention to the flow indicator on the valve; these fittings should screw into the output side. Keep in mind that the threads on the valve are plastic so don’t tighten them too much.
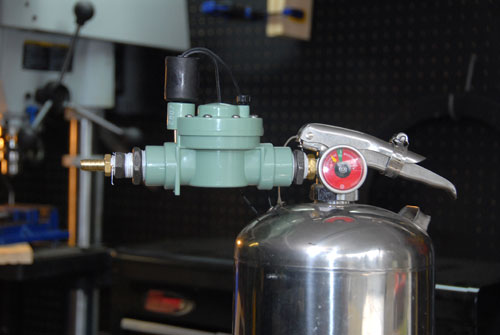
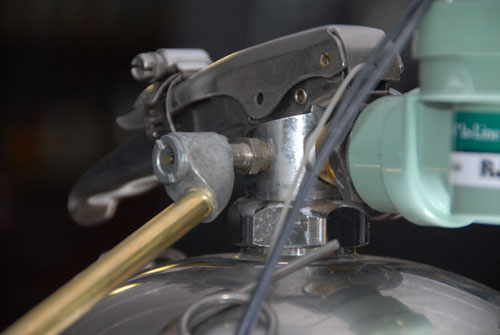
Now attach the other end of the valve to the fire extinguisher. Again use nylon tape and be careful not to strip the plastic threads. You might need to temporarily remove the manual bleed valve so that it clears the extinguisher handle as you are screwing it on.
Build Cannon Assembly
Glue the end cap onto the length of pipe using pipe cement. You can use epoxy, airplane glue or even duct tape for this part since this connection won’t be experiencing much air pressure. The idea is just to keep the cap attached to the pipe.
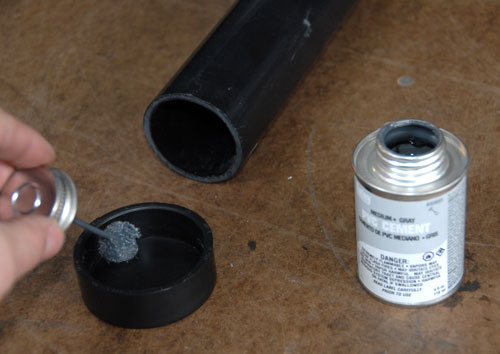
Drill a hole in the center of the end cap to accommodate the remaining barb fitting. I found it easiest to use one of those stepped drill bits and the hole ended up being 11/16″.
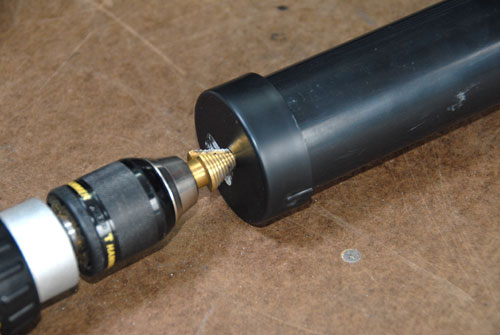
Screw the MIP end of the remaining barb fitting into the hole you just made. You won’t need tape for this one.
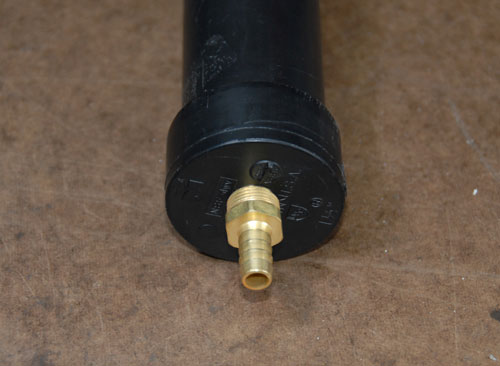
Connect Everything Together
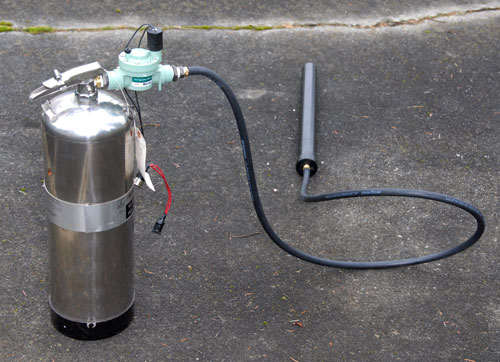
Cut a piece of rubber hose to whatever length you need between the tank and the cannon. Just remember that the longer the hose the more it will restrict the air flow. Just get the tank far enough away from the cannon that you can hide it. You can run long wires to it later if you are worried about firing it from a distance.
Attach one end of the hose to the barb on the tank and the other end to the one on the cannon.
Testing
Use an air compressor to fill up the extinguisher. The “full” marking on the pressure gauge is usually at 100psi, which is a good place to start. You can go up or down from there depending on the desired effect and how many casualties you want in your confetti war.
Now mount the cannon to something that will hold it upright. For the first picture in this article I zip-tied it to a stake I drove into the ground, but you can clamp it to a chair or have your neighbor’s kid hold it or whatever.
Fill the cannon with the confetti of your choice.
For testing purposes you can fire the cannon with the manual bleed on the solenoid valve. Do it. Do it now. If all goes well your friend that has been kindly helping you will be saying “Man, I’m glad I’m not the one who has to clean all this up!”
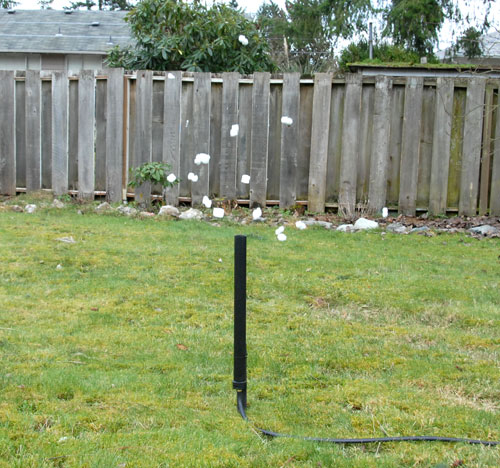
As it turns out it’s not very easy to take a picture of a confetti cannon in action. I wanted to show you a picture of the thing blowing massive amounts of shiny confetti over the heads of a room full of awed spectators, but instead you’ll have to settle for it gently blowing a few Styrofoam peanuts over my back yard. I promise you the effect was very impressive when I used two of them in a production of Cats recently.
Firing Control
Okay, so you are ready to fire your cannon electrically now. I’m going to leave the specifics of this up to you since I don’t know what kind of electrical stuff you have lying around your house. Basically you need some wire, a 24vac power supply and a button. Wire everything up in series. When you push the button it completes the circuit, applies power to the solenoid, opens the valve and FWOOSH!
Parting Thoughts
- If you need to you can use a 3/8″ MIP to 3/8″ FIP brass elbow on the bottom of the cannon to keep the hose from getting in the way.
- You can experiment with different PSIs and tube diameters to get the effect you are looking for. If you increase the pressure make sure not to exceed the maximum rating of your extinguisher or your valve.
- Sparkly confetti under stage lights has produced the best effect so far.
- If you have a cross-cut shredder you can make your own confetti for free.
- The lighter the confetti you use the higher it goes. The sparkly mylar stuff went up about 18 feet and the shredded copier paper went up about 12 in the rig described above.
Have fun with your new confetti cannon!
Update:
Here are a few notes based on comments I’ve received since I posted this article:
- If you don’t have a 24V power supply handy (Really? You don’t?), then you can use 3 9V batteries connected in series. I usually try to avoid battery-powered things in theatrical settings if I can, but for something that only has to work once there’s no reason not to go the battery route.
- Yes, I know they have fancy machines that take movin’ pictures nowadays. Sorry I was to lazy to post a video. I’ll get around to it someday, I promise. =)
- Yes, there are much nicer/fancier valves available. This project was all about Home-Depot engineering.
- It’s true that these valves do oscillate sometimes, making a honking sound. At the pressure I was running these cannons I didn’t have that problem. If I held the valve open too long so that the pressure dropped significantly then it happened sometimes, but by then all the confetti was already on the ground.
- Some folks remarked that these valves are way too slow. No they’re not. There is very little delay.
- Yes, it would probably be a bit more effective to mount the valve by the cannon instead of at the extinguisher. I had some pretty tight space requirements for the cannons when I designed them, so the valve ended up on the tank. The hose between the two was short enough that it didn’t seem to be a problem.


August 7th, 2011 at 3:17 AM
Sounds like you’ve experimented a lot with this. I was thinking of just using a valve at an air compressor that would manually be opened. That would eliminate having to use the batteries, etc. Is there an advantage to using the sprinkler valve? We want to mount ours up high in the air, so I was hoping to just run air hose to the cannon and then open the valve from a distance to release the air pressure. Any thoughts? Thanks!
August 7th, 2011 at 1:19 PM
@Steve I used the sprinkler valve because I had to operate the cannons from a control booth that was about 100 feet away. It was much easier to run a few wires than to run air hoses.
You could use a manual valve at a compressor if everything is fairly close together. The longer the hose between the tank/valve and the cannon, the less effective it will be. Since you are mounting your cannon in the air and running it from a distance you might not get the instantaneous burst of air you need. I think putting your tank and valve near the cannon would work better for you, but I say try it out. It may work well enough.
September 5th, 2011 at 4:15 PM
Particularly informative thank you, I think your trusty visitors might just want even more writing like this carry on the good content.
September 6th, 2011 at 1:03 PM
Very useful cheers, I do think your visitors might just want far more stories of this nature maintain the excellent content.
October 8th, 2011 at 5:52 PM
can you tell me exactly what you need for the power supply which you use? thanks
October 14th, 2011 at 4:54 PM
I used a variac, but something like this would work:
http://www.homedepot.com/h_d1/N-5yc1v/R-202209267/h_d2/ProductDisplay?langId=-1&storeId=10051&catalogId=10053
November 20th, 2011 at 7:22 AM
Hello, I Know your from Aol search engine. figured I should take a look around. I would read your site frequently. Look forward to checking out your some of your posts again.
January 17th, 2012 at 9:26 AM
can i know the specifications for the fire extinguisher? i’m doing confetti launcher for my final project. having so much problem. 🙁
February 13th, 2012 at 7:01 PM
I would like to build a confetti cannon like the one you posted. Thank you.
My question is, I’ve been told that these water filled extinguishers are normally filled with 2-1/2 gallons of water then pressurized to about 120lbs. However, without water, these tanks will explode if filled with just air pressure over 100lbs. Are you certain that its safe??
February 29th, 2012 at 3:58 PM
Nope, not certain at all. =) Seriously, though… A: I’ve never heard this, nor could I find anything to confirm/refute the theory, and B: I try to keep it <= 100 lbs. I would think that air pressure is air pressure whether or not there's water taking up some of the volume in the tank or not. Where did you hear about this? I'd like more information on the subject if you have any sources.
April 10th, 2012 at 8:43 PM
I have to say, Build a Pneumatic Confetti Cannon | Modd3d is a really superb site. I’d like to show you my personal thanks a lot. Thank you, Fabulous
May 6th, 2012 at 11:03 AM
So I’m trying to do this and I’m gettin stuck with the power part. If there is anyway you could help anymore that would be awesome. It just seems like you know way more than I do. Also if the sprinkler valve is ac how can you use batteries?
May 7th, 2012 at 2:28 PM
Some things will work on AC or DC even though they prefer one over the other. Have you tried the batteries yet? What did the valve do?
August 20th, 2012 at 4:23 PM
When i thoroughly go along with your current perspective to express to you the simple fact. We are really in awe of the complete design and style plus strengthen of the authoring.Thank you spreading the following with us.
May 31st, 2013 at 8:22 PM
thanks to the writer in support of wonderful his timepiece calculate sitting on this one.
October 11th, 2013 at 6:58 AM
Fantastic Post! I have been trying to find this today and also would like to have an e mail or maybe the changes because of this write-up. Keep in contact!
August 29th, 2017 at 12:37 AM
yess it works
July 23rd, 2018 at 9:56 AM
I really like what you said about putting together your own air cannon for confetti and prepping the fire extinguisher. My friends are looking to build something like this for fun and some parties and I really loved how you described the whole process. I’ll be sure to remember to make sure all the pressure is released from the fire extinguisher before unscrewing the hose.
July 29th, 2018 at 10:06 PM
I have need to use ribbon instead of confetti as the use i have will not allow me to use confetti. Can you try filling the tubes with ribbon instead of confetti and post the results.
I tried to use the concept you provided at 150psi but the valve kept cavitating. i need higher psi for ribbon. is there an alt. valve to suggest?
March 10th, 2019 at 11:46 AM
Yeah, you may need to use a valve that’s actually made for this type of thing (the sprinkler valve is pretty hacky!). Search for “pneumatic solenoid valve”.
March 2nd, 2019 at 7:40 PM
I like the idea and I’m wondering could I use an actual air compressor tank and then use the single vale to feed 4 cannons at the same time? They wouldn’t be very far from each other they would be on the points of and 18X18 square.
March 10th, 2019 at 11:42 AM
That should work, as long as your valves/tubing/tank can provide enough air volume for all 4 cannons.